Installing a smart home control panel may seem complex, but with a clear step-by-step guide, it can be smooth and hassle-free. Whether you're upgrading your current system or starting fresh, this article will walk you through the process.
Step 1: Choose the Installation Location
-
Select a central, easily accessible wall
-
Avoid placing it near heat sources or direct sunlight
-
Height recommendation: around 150cm from the ground
Step 2: Prepare the Wiring (For PoE or Wired Panels)
-
Ensure Cat5e/Cat6 cable is available for PoE models
-
If using AC power, verify power source and voltage compatibility
Step 3: Mount the Panel Bracket
-
Use a spirit level to ensure alignment
-
Drill holes and secure the bracket to the wall
Step 4: Connect the Panel
-
For PoE: Connect Ethernet cable to PoE injector or switch
-
For Wi-Fi: Follow on-screen prompts to connect to your network
Step 5: Initial Configuration
-
Boot up the system
-
Set preferred language, time zone, and network settings
-
Install necessary firmware updates
Step 6: Sync Devices
-
Pair lights, sensors, thermostats, and other smart devices
-
Create custom scenes and automation rules
Why Choose Portworld?
Portworld simplifies installation:
-
PoE-enabled panels reduce wiring complexity
-
Pre-configured firmware and software for quick deployment
-
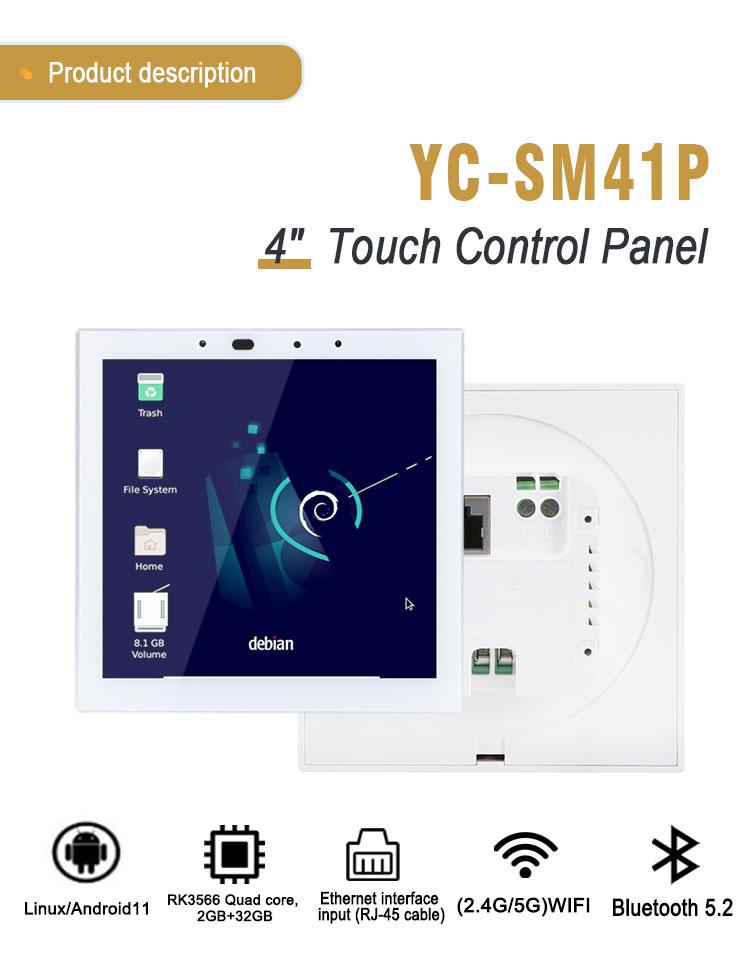
Android/Linux systems support flexible integration
Conclusion
Installing a smart home control panel is a great step toward smart living. With Portworld’s ready-to-go devices and rich support, installation becomes efficient and user-friendly.
What is the Purpose of the Raspberry Pi?
What You Can Do with a Compute Module 3?
YC-P6602 vs YC-P6801 vs YC-P6802: Comparing Portworld’s RK3566 & RK3568 Mainboards
Why Choose the P6802 Mainboard?
2025 Best Smart Home Touch Screen Control Panel